


Authentication and Authorization is a common feature in applications. It is one of the must-have features that any application should have. We all use different applications ranging from web to mobile application, these applications will most times ask users to sign in or sign up. it is at this stage authentication starts.
Most times developers use these words interchangeably, but they have different meanings and perform different functions but, they work together(like partners).
Let's understand the difference between them before we delve into the technical part of things.
Authentication
Simply put, authentication is the process of verifying who you(user) are. It is about a user identifying his self.
Authorization
Authorization is the process of verifying the access a user has. This happens usually after successful authentication. It is about giving access to a user.
Analogy
Using a real-life scenario. Imagine as you read this.
You are a student at a university/college, two policies were made.
- Only students of the university should be allowed through the school gate and;
- Only final year students should be allowed into the school auditorium.
You are not a final year student but you're a student of that university. When you got to the gate you showed your ID to the men at the gate and you were allowed in, you got to the auditorium entrance but you were denied access because you are not a final year student.
Now the point at which you showed your ID is authentication while the point you wanted to access the auditorium is the authorization.
========================================
Having this scenario painted in your head will help in understanding and differentiating between Authentication and Authorization.
Note!!!
This article is going to be split into parts. Auth is a very wide thing to write about. The article will be all-encompassing in order to cover auth at a very wide range. So I will advise you to subscribe to my newsletter to get notified as subsequent parts are published. This isn't the only way to do Auth, but this is how I do mine, and I am hoping to improve it. you can always use the comment section to get back to me.
FLOW
### Introduction
- understanding Auth
- listing out tools and dependencies(might change and be added to)
- explaining what the end result will be and how we get there
- next step

### Signup
- retrieve payloads
- payload validation
- check if the email exists in the database
- hash the password and generate a token
- save details into the database
- send email to the newly registered user
     - creation of a mailing service with nodemailer and Gmail
     - Send email to the user

### Account verification and activation
- retrieve the token and decode the token
- activate user account  (update user details)
- send an email of successful activation

### login
- get payload
- check if the email exists
- confirm if the password is correct
- create an access token

### Authorization
- get token from headers and decode
- retrieve user details from DB and check role
- Authorization decision
- code! code!! code!!!
we will be using MongoDB as the database for this project
Prerequisites
you should have node.js installed on your system
Postman should be installed. since we are building an API we test with the postman.
Basic understanding of node js and express framework is required.
Tools and packages
- vscode
- express, bcyrpt, MongoDB compass account, mongoose, nodemailer, Gmail account, jsonwebtoken, joi, e.t.c
End product
By the end of this article series, we will have a working auth system. where users can signup and get an email after successful signup with the content of the mail having a link to activate their account. The account gets activated and the user can now log in and have access to the endpoint they are allowed to have access to. we have two types of users, the customer, and the admins.
There are some routes that can be accessed by only the admins.
Let's get the ball rolling.
Project Folder Set up.
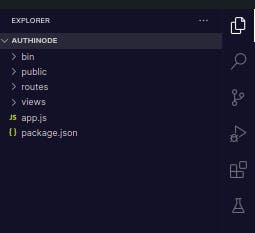
we will be using the express framework in this article. create a folder and name it anything of your choice. I named mine authinode. Navigate into the folder.
if you don't have express installed, follow the below step to do that
- open your terminal or CMD and install express globally on your system
npm install -g express-generator
express --view=ejs
adding the flag --view is for setting the template engine, but we wouldn't be using that. you should have a folder structure like this
some dependencies need to be installed, we do that by
npm install
now start the server with
npm start
Open your browser and type localhost:3000 in the address bar. localhost is your laptop's IP and 3000 is the port the server is running on.
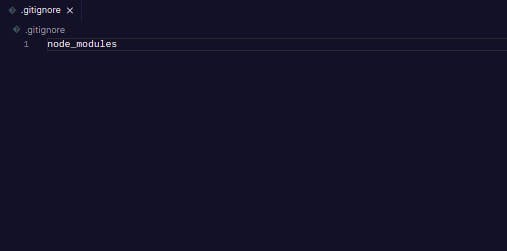
Create a .gitignore file in the base directory and write node_modules in the file. I always do this first in any of my node js projects. This is important so that we will not push the node_modlues to a version control
The project folder setup has been done, now let's have a sneak peek on the signup process.
Open the index.js file in the route folder, comment out the code from line 4 and type this
router.post("/users/signup", function(req, res, next){
  console.log("this is the signup route")
  return  res.status(200).json({ message: "login successful" });
});
type this in the console to reload the server
npm start
open postman to test out this endpoint. choose post as the method, type in localhost:3000 in the address bar, and hit enter or press the send button
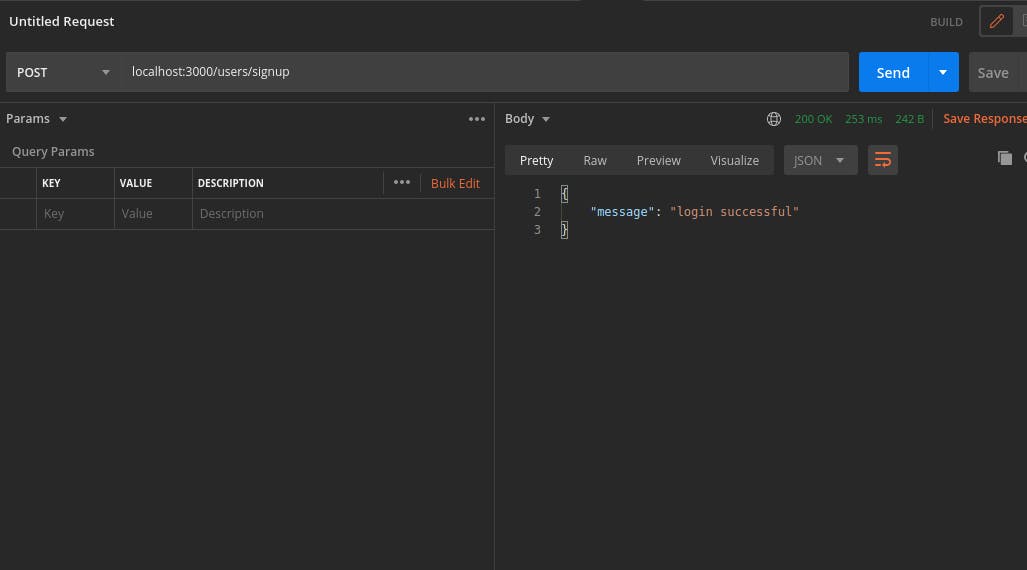
you have the above.
Let's install some packages
- nodemon: for automatic reload on every save of a js file
- mongoose: ORM for MongoDB
npm install nodemon mongoose
if you have nodemon installed globally already, you don't need to do that anymore.
This will be the end of part 1.
Signup for the newsletter to get updated when part two is out The second part will be on Signup. It contains a lot, so watch out for it.
I hope you enjoyed the article. Drop a comment for me in the comment section, tell me how to improve the article so that I can make the subsequent part interesting and more impacting.
RESOURCES